
I couldn't find a design for an earring display that I liked, so I decided to design my own:
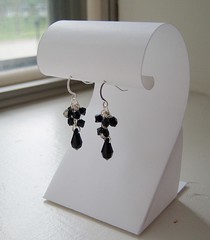
I posted pictures and vowed to post a tutorial if it held up. Unfortunately, it didn't do so hot at the show. The humidity caused it to droop down. However, I really love these for photography, and they'd probably be good for indoor shows. Hence, I am keeping my vow.
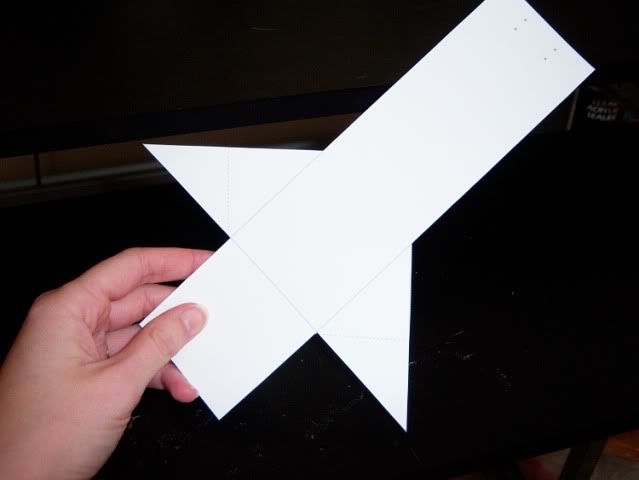
First of all, I've put up a template image that you can resize to fit your needs, or you can just look at it to design your own version. Click here for the full-size image.
The first step is to print out the template on card stock and cut it out. I just used a standard 8.5 x 11 piece of card stock in my printer.
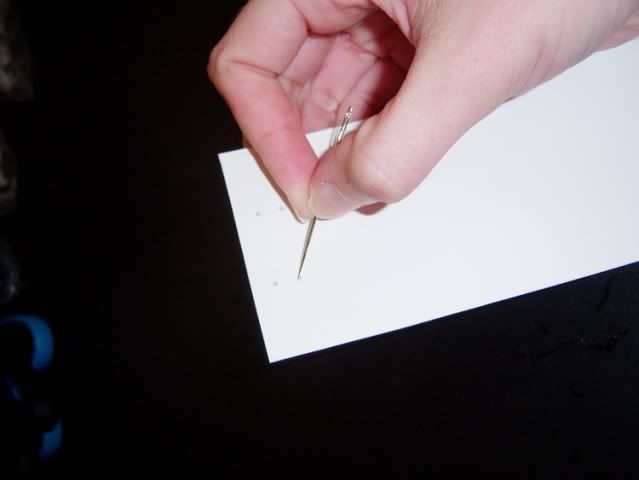
Next, stick a needle through all four of the dots near the top. This is where the earrings will attach.
Fold both of the "wings" in half. Fold them in toward the printed side so that the edge is parallel to the edge of the longest rectangle. Unfold.
Fold the "wings" completely inward so they're parallel to the square at the bottom. Unfold.
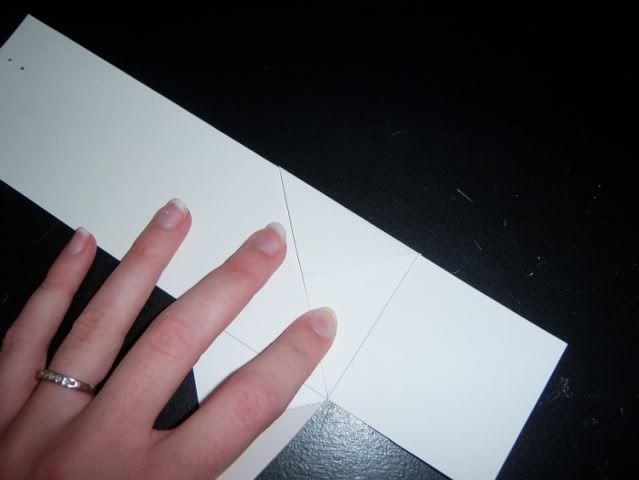
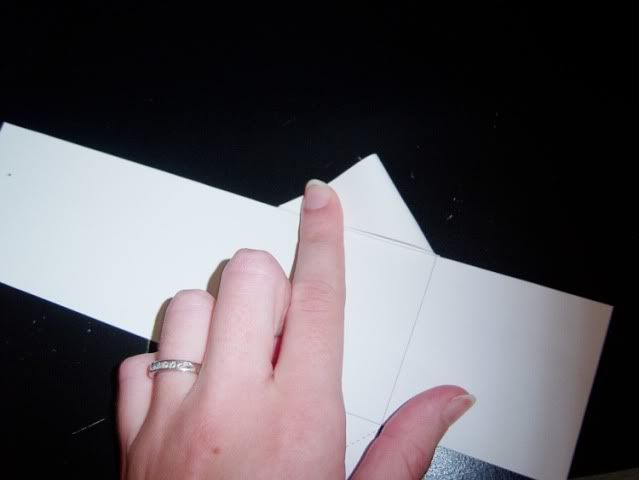
Fold the square at the bottom up along the solid line.

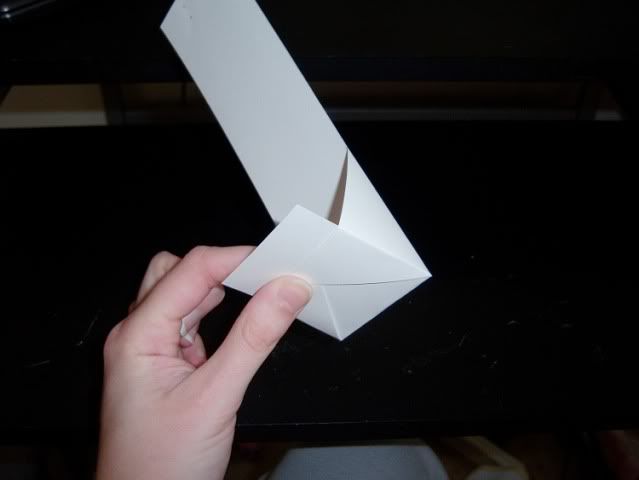
Unfold the square by about 45 degrees and wrap the wings over and around it. Put a piece of tape in the center (where my thumb is) to hold everything together.
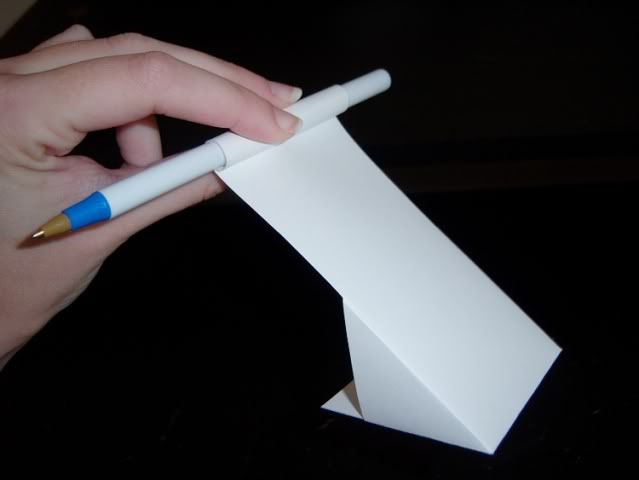
Wrap the top around a pen to get the curved shape. You should be able to manipulate the curled part so that it will stay nice and round and allow the earrings to hang nicely from the little holes. I sometimes take a very thin dowel and wrap the very tip around it so that it curls more tightly where the earrings go.
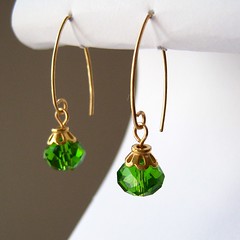
Take pretty pictures!
Hope that's helpful to someone. If anyone tries this out, I'd love to see what you've done!
Its a beautiful earring display and would work for other small items. I just wish I could make it using acrylic. Thanks so much for sharing.
ReplyDeleteEmily, thank you so much for posting this tutorial. It is very generous of you to share it with everyone. I've just spent a couple of hours looking at mannequin heads and ears, etc. I want it only for photos. I haven't tried this yet but i definitely will and I really like the look. Again, thank you very much.
ReplyDeleteMerci beaucoup pour ce partage de votre talent!
ReplyDeleteHi, the link to the template is not working
ReplyDelete