
My ProPay account was approved today. I shall be able to accept credit cards at my next show.
I was planning on accepting cards at my last one, but I had to mail in an exceptions form because ProPay couldn't validate my information. I've never heard of that happening to anyone. Most people can set it up on 10 minutes. Mine took a week. Lucky me.
I ordered a card imprinter with carbon copy slips and a business plate. I know I said I could just write down the information, but my mom talked me into it because it will make me look more professional. And I had an e-bay gift card. Best birthday present ever. I hope it gets here in time for the show... otherwise I'll be handwriting on sales receipts.
Austin's at a computer science conference in Florence, Italy. His mom went with him since Austin will be reimbursed for their hotel room. I'm staying with the cat my mom's while he's gone (I get lonely).
We also got some good news a couple of weeks ago. His paper was accepted into a conference in freaking HAWAII. In freaking JANUARY. We decided to spring for my plane ticket, so I'm coming along. Can't wait!
Tuesday, October 26, 2010
Wednesday, October 20, 2010
Upcoming Show in Troy
I haven't updated in awhile. I've been pretty busy the last couple of weeks, but I guess that's a good thing.
Austin ran 18 miles in the Chicago marathon. I was very proud of him. It was nice to visit with his family too.
I got accepted into a craft show (at the last minute) in Troy, IL. I'll be there Saturday and Sunday of this weekend. It looks like it's going to be HUGE. I'm debating getting a ProPay account so I can accept credit cards. I realized that if I sign up for the account, I'll have to write down credit card information to put into ProPay later. I can't imagine allowing someone to do that with my card. Everyone in the Etsy forums suggests getting a knucklebuster or a Propay card reader, but that just means paying more $ to record the exact same sensitive information. To me, those things almost seem like fooling people into thinking you're being more secure. ProPay says they can process and authorize orders over the phone. Maybe I'll give that a shot if people are willing to wait.
I improved the design for the earring display I posted awhile ago. I put a couple of pieces of wire along the edges and used mod podge to glue another piece of card stock on top. They're really sturdy now! Can't wait to try them out at the show.
Thursday, October 7, 2010
Going to Chicago this weekend. My strong, handsome husband is running in the Chicago marathon on Sunday. We'll be staying with his sister, and his mom's coming too. I am very excited.
Yesterday I applied to a couple of craft shows I found at the last minute. As a result, I felt the need to make a bunch of stuff today. I made some really pretty earrings. If they weren't such a pain to make, I might make some for myself. I shall post pictures later.
A (poorly lit) video of me playing with my cat:
Tuesday, October 5, 2010
Earring Display Tutorial
A couple of months ago, I decided to start making my own jewelry displays out of card stock. I was getting ready for my first show, and I didn't want to spend a lot of money on displays since I didn't know if it would be successful or not.
I couldn't find a design for an earring display that I liked, so I decided to design my own:
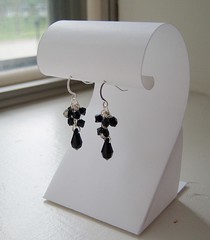
I posted pictures and vowed to post a tutorial if it held up. Unfortunately, it didn't do so hot at the show. The humidity caused it to droop down. However, I really love these for photography, and they'd probably be good for indoor shows. Hence, I am keeping my vow.
First of all, I've put up a template image that you can resize to fit your needs, or you can just look at it to design your own version. Click here for the full-size image.
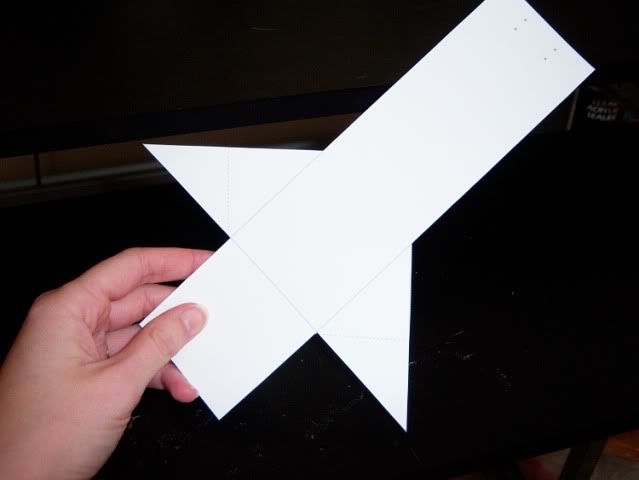
The first step is to print out the template on card stock and cut it out. I just used a standard 8.5 x 11 piece of card stock in my printer.
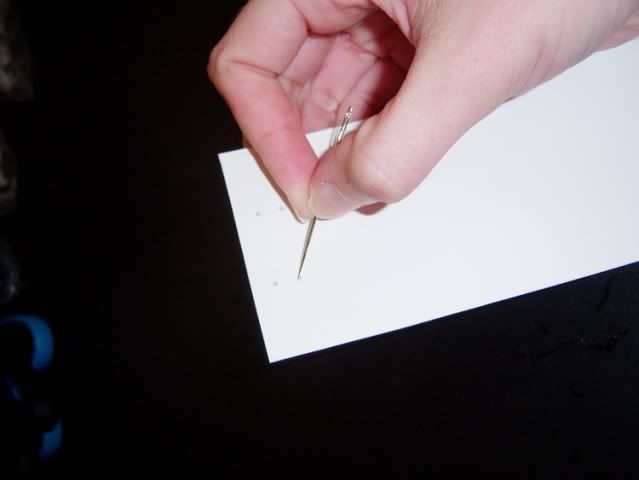
Next, stick a needle through all four of the dots near the top. This is where the earrings will attach.
Fold both of the "wings" in half. Fold them in toward the printed side so that the edge is parallel to the edge of the longest rectangle. Unfold.
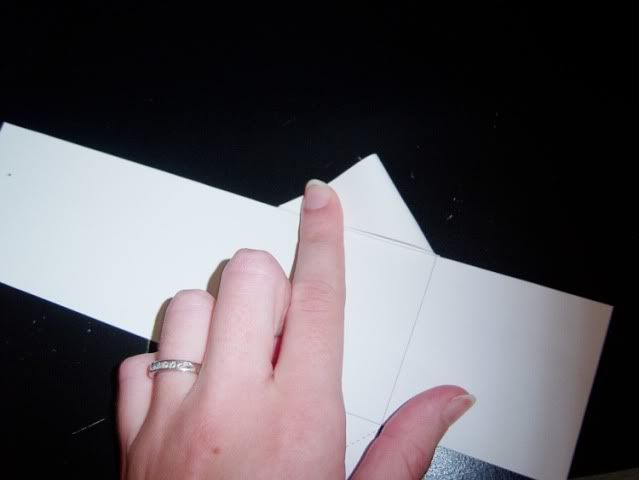
Fold the "wings" completely inward so they're parallel to the square at the bottom. Unfold.
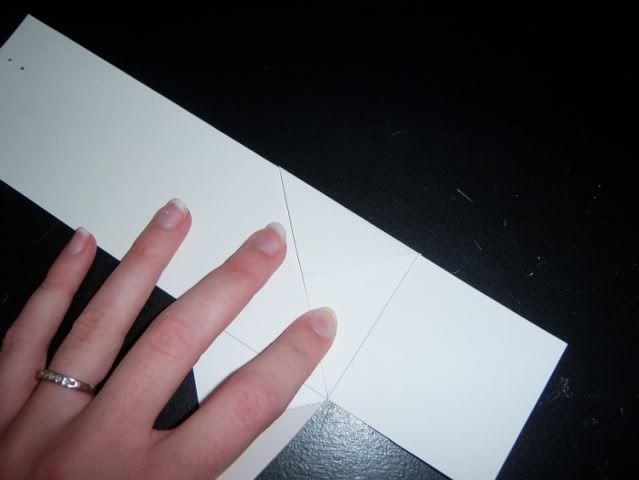
Fold the square at the bottom up along the solid line.

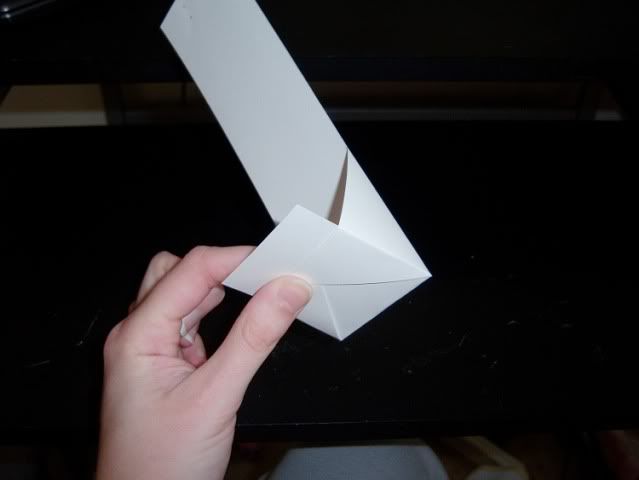
Unfold the square by about 45 degrees and wrap the wings over and around it. Put a piece of tape in the center (where my thumb is) to hold everything together.
Wrap the top around a pen to get the curved shape. You should be able to manipulate the curled part so that it will stay nice and round and allow the earrings to hang nicely from the little holes. I sometimes take a very thin dowel and wrap the very tip around it so that it curls more tightly where the earrings go.
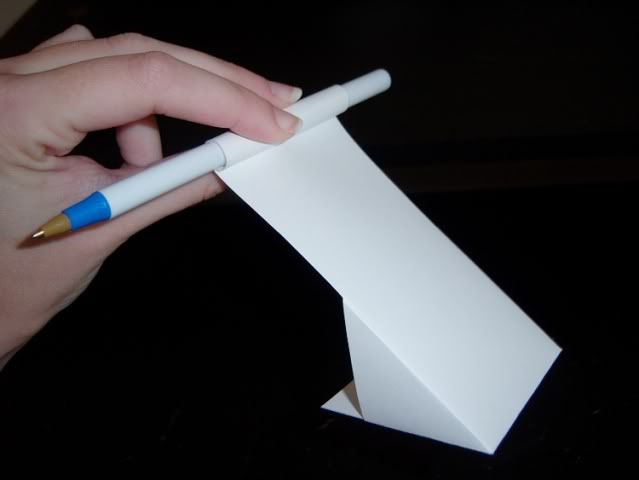
Take pretty pictures!
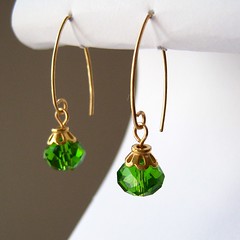
Hope that's helpful to someone. If anyone tries this out, I'd love to see what you've done!
I couldn't find a design for an earring display that I liked, so I decided to design my own:
I posted pictures and vowed to post a tutorial if it held up. Unfortunately, it didn't do so hot at the show. The humidity caused it to droop down. However, I really love these for photography, and they'd probably be good for indoor shows. Hence, I am keeping my vow.
First of all, I've put up a template image that you can resize to fit your needs, or you can just look at it to design your own version. Click here for the full-size image.
The first step is to print out the template on card stock and cut it out. I just used a standard 8.5 x 11 piece of card stock in my printer.
Next, stick a needle through all four of the dots near the top. This is where the earrings will attach.
Fold both of the "wings" in half. Fold them in toward the printed side so that the edge is parallel to the edge of the longest rectangle. Unfold.
Fold the "wings" completely inward so they're parallel to the square at the bottom. Unfold.
Fold the square at the bottom up along the solid line.
Unfold the square by about 45 degrees and wrap the wings over and around it. Put a piece of tape in the center (where my thumb is) to hold everything together.
Wrap the top around a pen to get the curved shape. You should be able to manipulate the curled part so that it will stay nice and round and allow the earrings to hang nicely from the little holes. I sometimes take a very thin dowel and wrap the very tip around it so that it curls more tightly where the earrings go.
Take pretty pictures!
Hope that's helpful to someone. If anyone tries this out, I'd love to see what you've done!
Subscribe to:
Posts (Atom)